
Looking for a fun and affordable fall craft that looks high-end but takes hardly any time?
This DIY stacked pumpkin topiary is the perfect way to add cozy seasonal charm to your home.
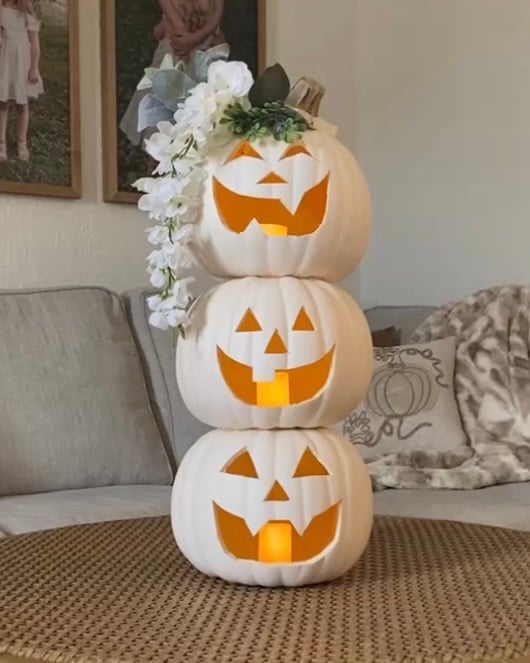
Whether you use dollar tree trick-or-treat buckets or Target’s carvable faux pumpkins, this project is simple, cute, and totally customizable.
Style it on your front porch, by your entryway, or even as a festive indoor accent.

📌 Pin it for later!
This post contains affiliate links. For more information, please read my disclosure here.
What You’ll Need
Note: I originally planned to use Dollar Tree jack-o’-lantern buckets for this project, but they were completely sold out.
So instead, I grabbed some white carvable faux pumpkins from Target. They were more expensive but honestly, I love how it turned out!
This DIY works with either option.
If you can find the Dollar Tree plastic buckets, you’ll just need to spray paint them white first.
If you’re using white carvable pumpkins like I did, you can skip the painting step and go straight to carving and stacking.
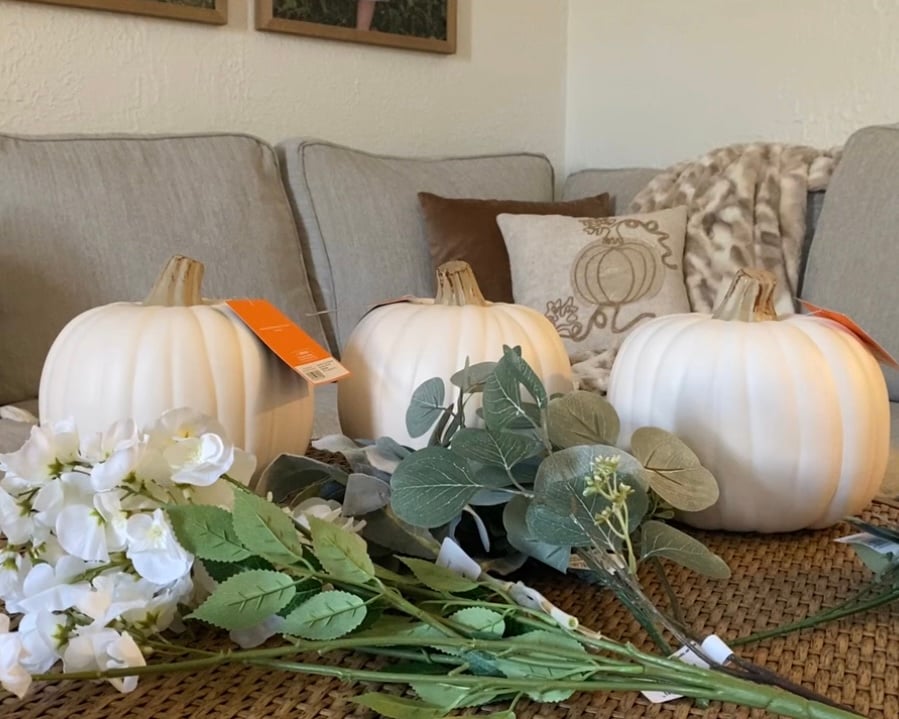
Supplies
- 3 pumpkins (Target’s carvable faux pumpkins or Dollar Tree trick-or-treat buckets)
- Faux flowers and eucalyptus
- Spray paint (only needed if you’re using the Dollar Tree buckets)
- Sharp knife (for carving faces)
- Hot glue gun
- Battery-operated tea lights
How To Make A Stacked Pumpkin Topiary
This easy DIY tutorial walks you through every step using either Dollar Tree trick-or-treat buckets or Target’s carvable pumpkins.
It’s the perfect Halloween or autumn decoration for your front porch or cozy corner indoors!
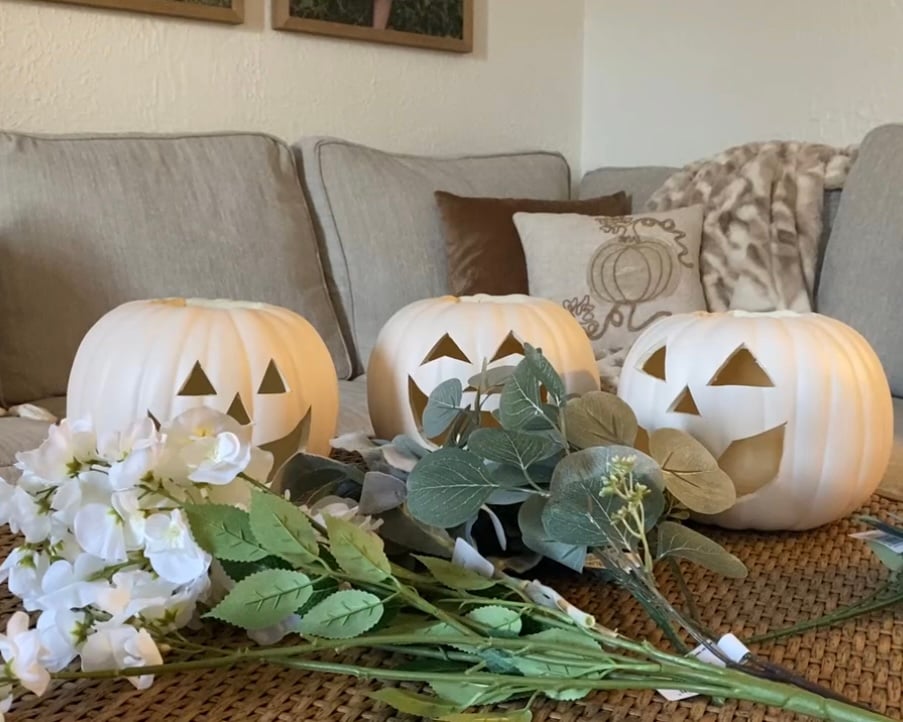
Step 1: Prep and Carve Your Pumpkins
If you’re using Dollar Tree trick-or-treat buckets, start by spray painting them white (or any color that fits your fall aesthetic).
Once the paint is fully dry, use a sharp knife to carefully carve a face into each bucket like you would a jack-o’-lantern.
If you’re using Target’s white carvable pumpkins, you can skip the painting.
Just carve a face into each one and remove the top. Be sure to save one pumpkin top to reattach later.
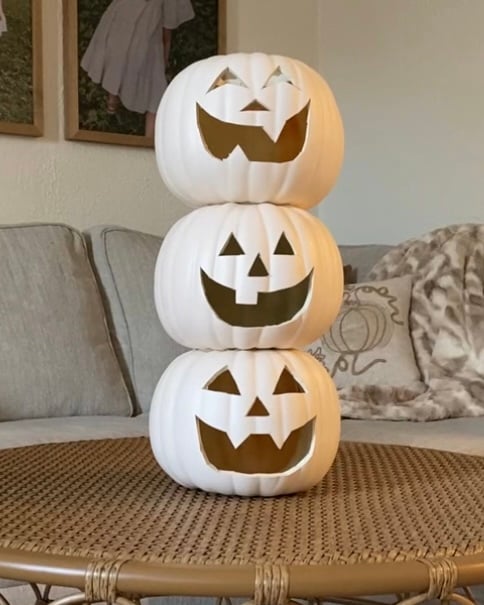
Step 2: Stack and Glue
Use a hot glue gun to attach the pumpkins on top of each other, making sure each one is centered and stable.
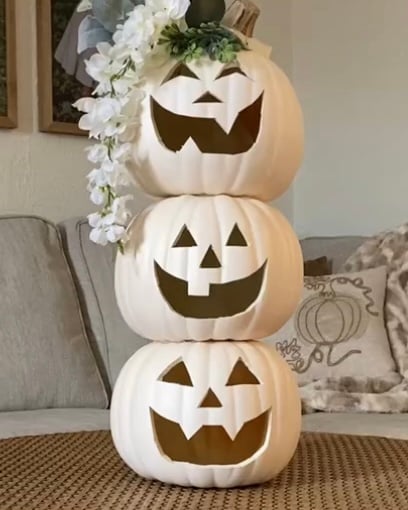
Step 3: Decorate the Top Pumpkin
Hot glue your faux flowers and fall leaves onto the top pumpkin only.
You can cluster them on one side for a soft, whimsical touch or arrange them however you like to match your decor style.
Step 4: Add the Finishing Touches
Take the pumpkin top you saved earlier and glue it back onto the top pumpkin, tilting it slightly to one side for a cute, finished look.
Then place battery-operated tea lights inside each pumpkin to give them a warm, cozy glow, perfect for fall evenings.
Tips & Variations
- Make it spooky: Swap out the white pumpkins for black ones and use dark purple or orange florals for a moodier Halloween vibe.
- Classic Halloween look: Use bright orange pumpkins with black painted faces and a big burlap bow on top for a playful twist.
- Glow it up: Add a strand of battery-powered fairy lights inside each pumpkin for extra sparkle at night.
- Weatherproof it: If displaying outdoors, make sure to use outdoor-safe glue and flowers that can handle a little moisture.
- Mini version: Don’t have room for a full topiary? Stack two pumpkins instead and place them on a small side table, kitchen counter, or fireplace mantel.
- Theme it: Try neutral florals for farmhouse style, buffalo check ribbon for rustic charm, or eucalyptus for a soft boho feel.
Whether you’re decorating for Halloween or just want a cozy fall vibe, this stacked pumpkin topiary is such a fun and simple project.
I love how it turned out, and I hope it inspires your own autumn crafting!
Don’t forget to pin this to Pinterest and share with your friends ❤️


