

Dividing a room with a temporary wall is an effective way to repurpose existing spaces in your home or apartment.
Do you need a partition wall to accommodate a growing family, create a home office, or simply add privacy within an open layout?
These walls are easily customizable and can be a great DIY project for any homeowner or renter looking to split up any room.
You have a few options for creative solutions and materials to construct temporary walls. Today we’ll explore all your options, like modular wall systems, sliding doors, and even tension-based installations.
As non-load-bearing structures, these walls can be installed and removed without causing damage. They’re perfect fix for renters looking for temporary solutions.
Today I want to show you all the ways to build a temporary wall, whatever your needs may be.
From selecting the appropriate materials to maneuvering through challenges with DIY installation, this guide has the best tips and advice to help you divide a room with a temporary walls.
This post contains affiliate links. For more information, please read my disclosure here.
What are temporary walls?
Temporary walls are a practical solution for dividing a room into separate private spaces. These walls however, don’t make permanent changes to the rooms structure.
They can be used in apartments, offices, and medical facilities to create two or even more separate rooms in one.
Partition Types
There are a few different partition types when it comes to temporary walls. Some popular options include:
- Freestanding walls: These walls are not attached to the floor, ceiling, or existing walls, making them easy to move and adjust.
- Modular walls: These walls consist of interlocking, lightweight panels that can be arranged in various configurations. They offer greater flexibility and easy assembly.
- Sliding or folding walls: These walls consist of panels that slide or fold on a track. This makes them a great option to open and close off spaces as needed.
- Curtain or rope partitions: For a softer, flexible partition, curtains, macrame, or rope can be suspended from the ceiling or walls to divide the room.
Materials and Tools
Temporary walls can be made from different materials depending on what appearance you’d like, durability, and of course your budget. Some common materials include:
- Wood: A sturdy option, often used for freestanding walls, that can be easily painted or stained to match the room’s decor.
- Plywood: An affordable and lightweight option, great for modular wall systems or DIY temporary wall projects.
- Drywall: A popular choice for interior walls. Drywall gives a smooth finish you can paint whatever color you’d like.
- Metal: Used for creating strong, slim-profile walls, often found in sliding or folding wall systems.
- Fabric: Like a sheet or curtain. An easy choice, however it doesn’t offer any sound proofing.

To build a temporary wall, you will need the following tools:
- Drill
- Hammer
- Screws
- Sill seal for sealing off any gaps between the temporary wall and existing surfaces
- Wooden shims to ensure proper alignment and stability
- Measuring tape
Building Tips
When constructing a temporary wall, keep the following tips in mind:
- Measure and plan the space carefully to make sure the wall will fit properly.
- Use appropriate hardware to secure the wall components together and to the existing surfaces if necessary
- Apply sill seal to any surfaces that the wall will touch. This gives added insulation and protection for both the temporary wall and the existing surfaces.
- Paint or stain the wall to match the room’s color scheme.
- Position and level the wall correctly using furniture levelers in order to get a secure installation.
Follow these tips and you’re on your way to creating a sturdy temporary wall system.
How to Build a Temporary Wall
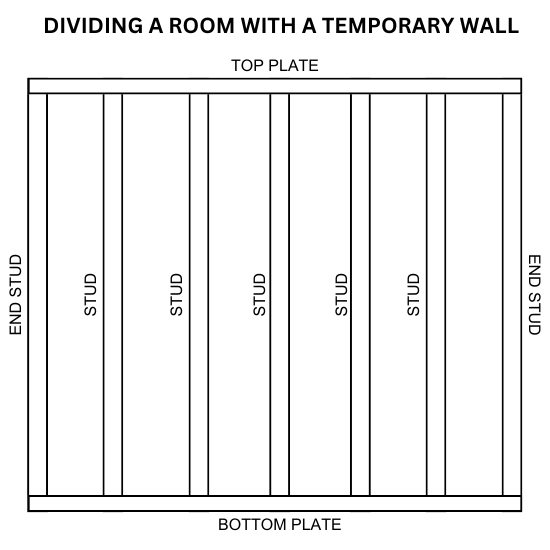
Step 1: Measure and Design
First, measure the space where the temporary wall, also known as a room divider or partition, will be installed.
Be sure to account for the height and width of the room. Create a design for the temporary wall.
Include the location of vertical studs and any openings for doors or windows. Sketch out your design to help guide the assembly.
Step 2: Apply Sill Seal
Many DIY enthusiasts are not familiar with sill seal, even if they have completed projects before.
This foam, which is ¼-inch thick, serves two purposes. Firstly, it safeguards the current floor, walls, and ceiling from any harm.
Secondly, and more crucially, it supplies the necessary pressure to firmly place the temporary wall in any desired location.
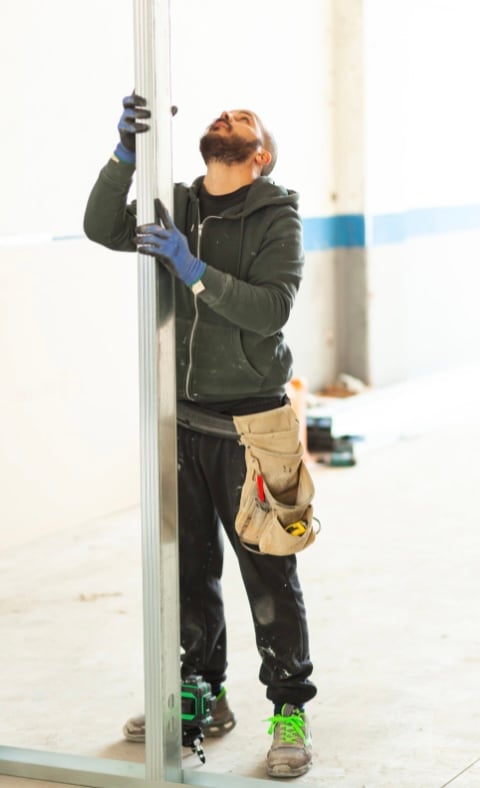
Step 3: Cut a pair of 2x4s for the length of wall
Using the measurements you took for your temporary wall cut each 2x4s for the length your it will be.
These two pieces you have now are called the “plates” and will be the top and bottom of your wall.
Step 4: Cut two more 2x4s to create end studs
Taking your measurements for the distance between the floor and the ceiling, deduct 3 inches.
Use this new measurement to cut two 2x4s that will serve as your end studs.
It’s likely that this measurement will differ for each side due to slants in floors and ceilings.
You’ll want to measure twice, once for the left side of the temporary wall, and then again for the right side.
Step 5: Cut additional studs
Your end studs will go at the ends of your wall but you will need additional supporting studs placed every 16 to 24 inches
Step 6: Insert vertical studs between the plates
Place the bottom plate on top of the previously installed sill seal on the floor.
Then you’ll need help from someone to hold the top plate, which should have sill seal placed between the board and ceiling, while you position the end studs in place.
Keep in mind that the sill seal should also be installed along the existing walls where the vertical members will be placed.
If you have trouble getting your end studs to fit you can try tapping them in place with a hammer.
If your board is too big you may need to use a circular saw to cut a little more off your board to get it to fit.
If your board is too small you can use the wooden shims to fill in the gap in length as opposed to cutting a new 2×4.
Step 7: Secure outside studs to plates with screws
With your perimeter established, you now want to screw your end studs to your plates to secure them together.
For added stability, screw your top plate to the ceiling and end stud to the wall.
Step 8: Install additional studs
Now it’s time to install your additional studs by screwing them to your top and bottom plates. These should be placed every 16 to 24 inches.
If your measurements are off, again you may need to cut your boards shorter. If they’re too short you can again use wood shims.
Step 9: Attach drywall panels to temporary wall
You now have the structure of your wall built and can screw on your drywall panels.
At this step you may choose to add fiberglass insulation to reduce noise transmission between the separate rooms.
Step 10: Finishing touches
Now that you’ve built your temporary wall you can have fun decorating it with paint or adding a fun wall paper.
For visual learners, please watch the video below on how to build a temporary wall.

Creative Room Divider Ideas
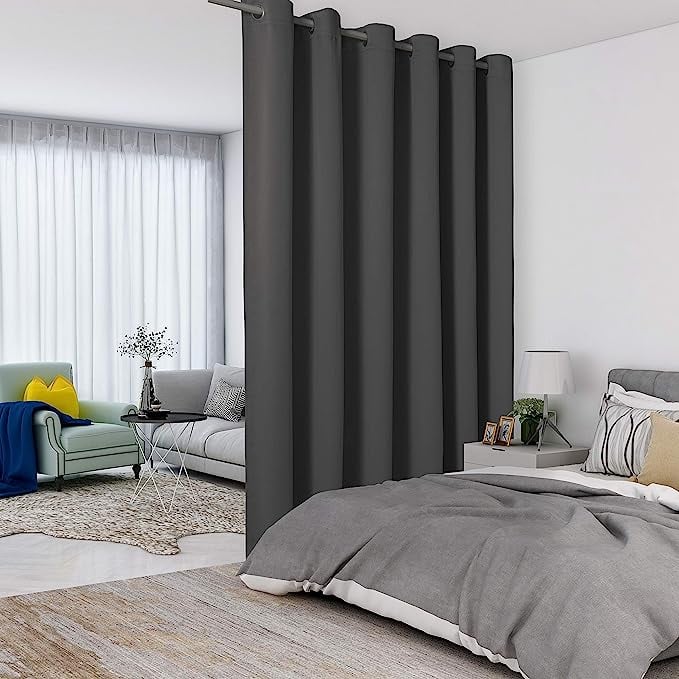
Curtain Room Dividers
One simple and easy way to divide a room temporarily is by using curtain room dividers.
These can be made from different materials like fabric, macrame, or even beaded strings.
They help create private spaces in an open floor plan without the hassle of building a temporary wall.
Curtain room dividers are a popular choice because they are easy to install and can be changed whenever you want to update the look of your room.
They can be hung from the ceiling or attached to a rod using hooks.
Bookcase Partitions
A bookcase partition is a creative way to divide a room temporarily.
Choose an open shelving design that allows light to pass through and creates a sense of openness.
You can opt for a freestanding unit but one that is mounted on casters will make it easier to move.
You can decorate the shelf with books, plants, and other fun decor.

Folding Screens
Folding screens, also known as Shoji screens, are a classic choice for creating temporary partitions in a room.
Typically made from wood or metal frames with fabric or paper panels, they are an elegant and adaptable option for dividing a room.
You can get them in different designs, materials, and sizes to suit any decor style. They can also be painted or decorated to match the theme of your room.
The best part is folding screens can easily be moved and stored when not in use.

Sliding Door Blinds
Sliding door blinds are another great options for a dividing wall. These use blackout fabric to filter light and give you privacy.
With the lightweight track panel, you can install the track with wall-mounted or ceiling mount kits.
Multi-Purpose Dividers
Opt for multi-functional room dividers that provide more than just partitioning. For instance, a pallet room divider can also be used as a headboard or even a plant holder.
Wooden slats or panels can be arranged in creative ways to form a partition. These dividers can be made from repurposed materials or crafted using new pieces.
Considerations When Dividing a Room
Homeowners VS Renters
When dividing a room with a temporary wall, it’s important to consider the differences between homeowners and renters.
Homeowners typically have more freedom to make permanent changes to their space, but even so, a temporary wall might be a better option if they don’t want to commit to a permanent change.
On the other hand, renters often face restrictions from landlords, and will benefit from using lightweight, non-damaging temporary walls that don’t require nailing or screwing into existing structures.
Privacy and Natural Light
Maintaining privacy and natural light are important considerations when dividing a room.
Temporary walls often have the drawback of not providing substantial soundproofing, but it’s still possible to get the privacy you’re looking for by using thicker or denser materials for the wall.
Room Layout and Functionality
The layout and functionality of the room should be taken into account when introducing a temporary wall.
In a home office setting you want to make sure that the division creates enough space for a proper work area and storage solutions.
Then when you’re dividing a living area you’ll have to be thoughtful about how the dividers placement will change your furniture arrangement.
Figure out the best way to divide the room, making sure it’s easy to move around and get to different areas.
Conclusion
Dividing a room with a temporary wall is a practical and efficient solution for creating private spaces and organizing living areas.
The use of temporary walls is applicable in various settings, from households to offices and even military warehouses.
Consider factors like material, design, and installation method to achieve the results you’re looking for.
By carefully following the steps above you’ll be on your way to dividing your room with a temporary wall.


