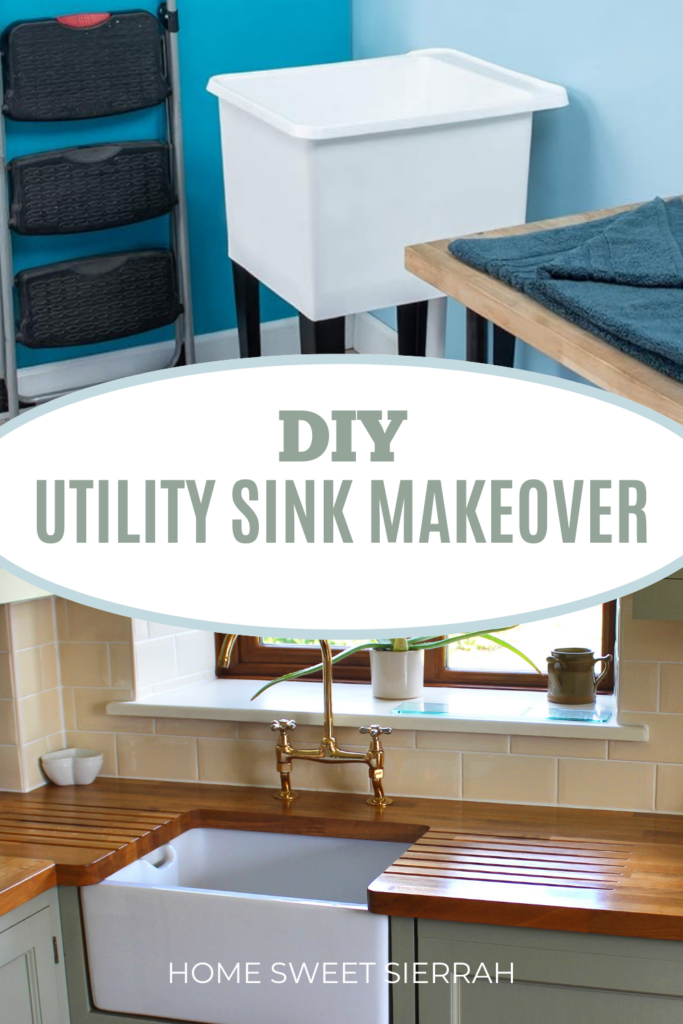
A DIY utility sink makeover can transform an often-dismissed area into a stylish and practical space.
Utility sinks are often overlooked when it comes to home makeovers, but they play an important role in a functional and efficient laundry room.
With some creativity and a few tools, anyone can give their utility sink a fresh new look.

In this article, we will explore various methods for making over a utility sink, including creating a faux cabinet to hide unsightly pipes and the sink itself.
We will also discuss adding a folding counter with a waterfall side to increase the workspace while still keeping a minimalistic aesthetic.
These techniques require minimal effort and can be completed by even novice DIY enthusiasts.
Through these DIY utility sink makeover projects, homeowners can elevate their laundry space, adding both practicality and visual appeal.
With detailed instructions and guidance, even the most basic utility sink can become a stylish and functional element in a well-designed laundry room.
This post contains affiliate links. For more information, please read my disclosure here.
Understanding the Scope

When undertaking a DIY utility sink makeover, it is essential to first understand the scope of the project.
This involves assessing the current state of the laundry room and determining if a laundry room makeover is necessary or if the focus should primarily be on the utility sink itself.
In many cases, a utility sink makeover can greatly improve the overall aesthetics of the laundry room.
However, it is important to establish a budget beforehand. This will help guide decision-making and allow for proper allocation of resources.
Allocating a budget can ensure that the makeover is realistic and achievable without causing financial strain.
Next, developing a plan for the makeover is a crucial step. This allows for a clear overview of the project, including what needs to be done and how to accomplish each task.
When planning, it’s essential to consider factors such as available space, preferred materials, and desired features.
Keep in mind the original purpose and function of the utility sink, and incorporate these elements into the plan.
Incorporating a variety of materials and design elements into the makeover can help create a functional and visually appealing workspace.
For instance, consider using durable materials, such as wood or tile, for the utility sink area.
Decorating with accessories like shelves, hooks, or baskets can also enhance the overall look and functionality of the space.
When approaching a DIY utility sink makeover, it’s key to remember that patience and flexibility are necessary.
Being open to adjustments and being prepared to reassess the plan throughout the process will ensure that the end result is both aesthetically pleasing and functional.
With proper planning, budgeting, and attention to detail, a successful utility sink makeover is well within reach.
Design and Planning

When planning a DIY utility sink makeover, it’s essential to consider the design, storage options, and any challenges that may arise during the project.
The goal is to create a functional and aesthetically pleasing utility sink area that meets your needs while staying within budget.
Begin by determining the desired appearance and features of the utility sink. Would you like a built-in cabinet area to hide pipes and create additional storage?
Or perhaps you prefer a simpler design with open shelves or a skirt to conceal the plumbing.
Taking time to plan the design will ensure that your sink makeover is functional, practical, and visually appealing.
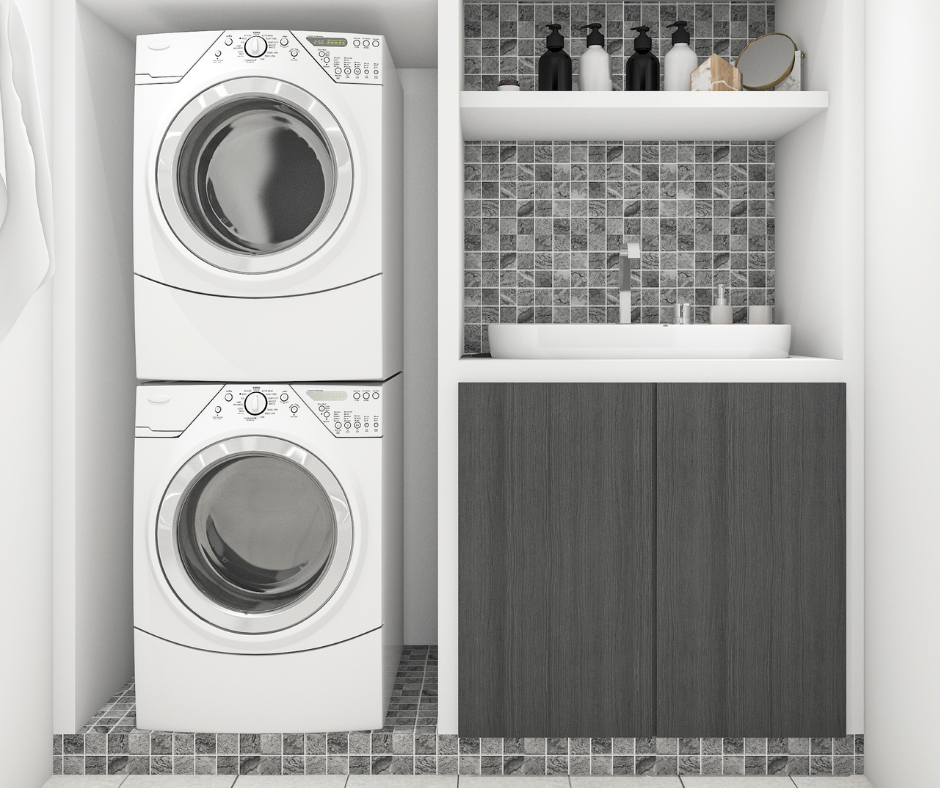
Next, consider the available storage opportunities. In a utility sink area, practical storage is crucial for keeping cleaning supplies, tools, and other essentials organized and easily accessible.
Depending on the chosen design, you can include built-in cabinets, open shelves, or even a folding counter to maximize storage options.
Keep in mind that updating a utility sink doesn’t have to be a daunting task.
With careful planning and a well-thought-out design, you can transform your utility sink area into a functional and beautiful space that meets your storage needs and adds value to your home—without breaking the bank.
Materials and Tools Requirement
When undertaking a DIY utility sink makeover, it is essential to gather all the necessary materials and tools for a successful project.
First and foremost, you will need boards or plywood for the frame or faux cabinet. Choose the appropriate size and type according to your utility sink design and consider purchasing sanded plywood for a smoother surface.
In addition to the boards, gather some screws and wood glue to help secure the frame or faux cabinet together.
A nail gun with compatible nails will also come in handy when attaching the various wooden components together.
To give your utility sink makeover a polished and smooth appearance, be sure to have sandpaper or an electric sander for preparing the wood surfaces.
Apply wood filler to any gaps, seams, or imperfections in the wood, and after the filler dries, sand the area for a smooth finish.
For a customized and pleasing look, consider using stain or spray paint for the wooden components. Browse various colors and finishes to match your space’s decor.
Once you have a stain picked out, use a brush or cloth to apply it evenly across the wood surfaces. Allow it to dry thoroughly before assembling the sink and faux cabinet.
If you plan on changing or upgrading your utility sink’s plumbing, prepare the necessary plumbing components such as pipes, valves, and connectors.
Additionally, a caulk and putty knife will help seal any gaps that could lead to leaks.
For cutting the wood to size, use a circular saw or jigsaw. These power tools will allow you to make the precise cuts needed for your project.
To assemble the faux cabinet properly, a drill will be necessary for creating pilot holes to install screws.
Finishing touches can make a big difference in overall appearance. Consider incorporating fabric to add a decorative skirt or cover to the utility sink.
Choose a fabric that matches your design scheme and use an iron to eradicate any wrinkles or creases.
Constructing the Cabinet Base

When constructing a cabinet base for a utility sink makeover, start by planning the height, width, and depth of your cabinet.
Take measurements of the area around your utility sink to ensure the cabinet will fit properly and not obstruct any pipes or plumbing.
Once you have the dimensions, begin by building a sturdy frame using pieces of wood.
This frame will serve as the foundation for your cabinet, so make sure it is strong and stable.
Attach the pieces using wood screws or metal brackets, and be sure to check for squareness after each connection.
Next, add the legs to the frame. Choose legs that not only provide stability, but also complement your desired aesthetic.
Measure the desired leg length and cut the legs from wood or purchase pre-cut legs. Fix the legs to the bottom corners of your frame, ensuring they are aligned and secure.
For the bottom of your cabinet base, cut a piece of wood that matches the width and depth of your frame.
Attach this bottom piece by screwing or nailing it into place on top of the legs. This will create a flat surface for storage or to mount the utility sink.
Once the bottom is in place, you may add any optional shelves or dividers for additional storage. Be sure to measure carefully and cut the pieces to fit snugly within the cabinet frame.
Finally, construct the cabinet’s front and sides. Measure and cut pieces of wood for each side and the front, keeping in mind any necessary cutouts to accommodate the utility sink.
Attach these panels to the frame with glue or fasteners, making certain they are square and flush.
By following these steps, you can create a custom cabinet base for your utility sink that is not only functional but also adds style and organization to your workspace.
Assembling the Utility Sink

When undertaking a DIY utility sink makeover, the first step is to assemble the utility sink. Begin by choosing the location for the sink in your laundry room, ensuring it is close to the necessary plumbing connections.
Mark the position of the sink base, taking into account the drain location and the position of any wall studs.
Next, prepare the sink base by attaching the necessary hardware, such as support brackets and leg mounts.
It is crucial to securely fasten these components to ensure the stability of your sink.
Additionally, assemble the sink legs, which will help support the weight of the utility sink.
Once the sink base and legs are prepared, position the sink within the marked area on the wall, making sure it is level.
Attach the sink to the wall studs using appropriate fasteners, such as wood screws for wooden studs or masonry screws for concrete walls. This will ensure the sink is firmly anchored and safe for use.
The final step in assembling the utility sink is connecting the drain. First, install a strainer on the bottom of the sink.
Then, connect the drainpipe to the sink’s drain outlet, making sure the connection is watertight. The final connection should be made to the existing drain or a new dedicated drain line.
Assembling a DIY utility sink requires attention to detail and proper planning.
By following these steps and ensuring a secure connection to both the wall and plumbing, you can enjoy a functional and improved utility sink in your laundry room.
Wood Works and Finishing

When beginning a DIY utility sink makeover, it is important to address the wooden components of the project, including sink cabinet and framing.
First, assess the wood surfaces for any cracks, nail holes, or imperfections. Use wood filler to repair these areas, applying it with a putty knife and ensuring a smooth, even surface.
Allow the filler to dry according to the manufacturer’s instructions.
Next, gather the necessary sanding supplies, such as sandpaper in various grits (coarse, medium, and fine) and a sander.
Begin by sanding the wood with coarse sandpaper, working in the direction of the wood grain.
Gradually move to medium and then fine grit sandpaper, ensuring all surfaces are smooth and even.
Wipe the wood clean with a damp cloth to remove any remaining dust.
Staining the wood is an optional step, but it can enhance the appearance of the sink cabinet.
Choose a stain color that complements the existing decor of the room. Apply the stain with a brush or clean cloth, working in the direction of the wood grain. Allow the stain to penetrate the wood for the recommended time before wiping off any excess with a clean cloth.
Depending on the desired color intensity, additional coats may be necessary. Allow the stain to dry completely.
For added protection and durability, apply a sealant over the stained wood. This can be a clear polyurethane or a tinted sealant that complements the chosen stain color.
Follow the manufacturer’s recommended application process and drying time.
If opting for a painted finish instead of stain, prime the sanded wood surfaces first to ensure proper paint adhesion.
Choose a paint color that matches the room’s decor and apply the paint with a brush or roller, following the grain direction.
Allow the paint to dry, and apply additional coats as needed.
For small details or hard-to-reach areas, spray paint can be a helpful alternative. When using spray paint, ensure proper ventilation and follow the manufacturer’s instructions for application and drying time.
This can add a finishing touch to your DIY utility sink makeover, leaving you with a functional and aesthetically pleasing result.
Mounting and Installing

When undertaking a DIY utility sink makeover, the process of mounting and installing the sink involves a few essential steps.
First, identify the optimal location for the utility sink, ideally near existing plumbing connections. This will significantly reduce the complexity and cost of the installation process.
Begin by marking the wall where the sink’s cabinet base and countertop will be installed. It is important to ensure that the surface is level for a secure and stable finished product.
Once marked, proceed with drilling the necessary holes for the wall-mounted supports or brackets, using a drill with the appropriate bit.
These supports will bear the weight of the sink and countertop, ensuring that they remain secure.
Next, gather the necessary hardware such as screws and anchors, and start attaching the cabinet base to the wall.
If there are studs located in the area where the cabinet will be installed, use screws to secure the cabinet directly to the studs.
However, if there are no studs available, use anchors in conjunction with the screws to ensure a stable and secure installation.
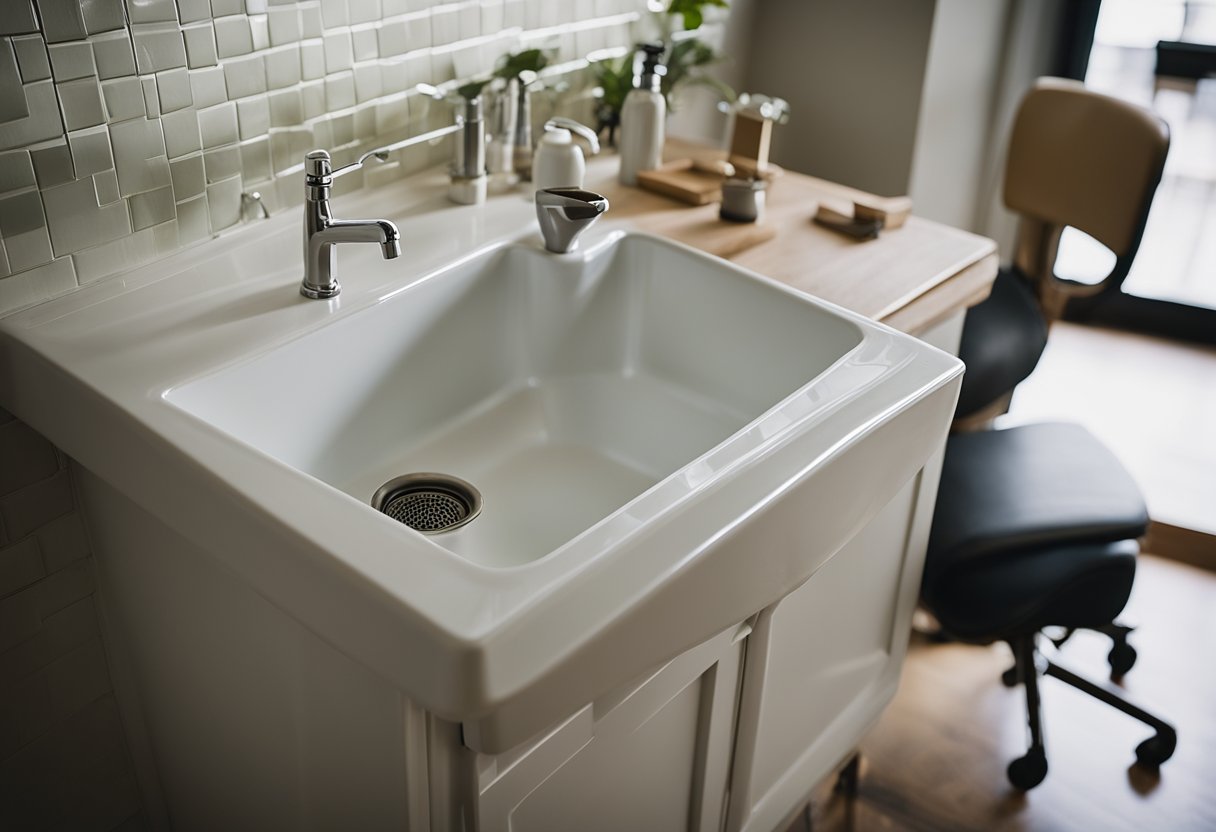
With the cabinet base securely in place, it’s time to move on to the countertop. Depending on the specific design and materials, the process may vary slightly.
Generally, the countertop should be secured to the cabinet base using screws. Ensure that the countertop is level, and adjust as necessary.
Finally, it’s time to install the utility sink into the countertop. Follow the manufacturer’s instructions to properly install and secure the sink, taking care to install any necessary plumbing and connections as well.
With the sink in place, the DIY utility sink makeover is now complete, offering a functional and visually-appealing addition to your space.
Keep in mind that when performing a DIY utility sink makeover, it is crucial to adhere to local building codes and safety regulations.
If you are uncertain of any part of the installation process or if you encounter any plumbing issues, consult with a professional for assistance.
Final Touches
Once you have constructed the frame for your utility sink makeover, it’s crucial to focus on the final touches that elevate the overall appearance and function of the space.
By using materials like fabric, sanded plywood, and design elements to reflect your personal style, your sink will become both a practical and visually appealing part of your home.
Begin by choosing a fabric that compliments your design aesthetic.
Attach the fabric to the front, sides, or even the back of the utility sink cabinet using wood glue. This not only hides unsightly plumbing but also adds a unique touch to your project.
Ensure that the glue has dried completely before moving onto the next step.
Next, it’s time to focus on the countertop. Select a piece of sanded plywood that fits your desired measurements.
Sanded plywood offers a smooth surface and is an excellent choice for painting or staining to match your design vision.
Cut the plywood to size and fix it on top of the cabinet using wood glue and nails. Sand the edges to create a smooth and seamless finish.
When it comes to finishing touches, consider applying a layer of paint or stain to the exposed wood surfaces for a polished look.
Additionally, you may choose to replace or update the faucet to match your design theme or add extra functionality, such as a sprayer attachment or a high-arching faucet for increased clearance.
Finally, accessorize your sink area with coordinating items like a soap dispenser, dish rack, or drying mat.
These functional elements not only serve a purpose but contribute to the overall cohesive design of your utility sink makeover.
By incorporating fabric, design elements, and proper finishing techniques, your DIY utility sink makeover will become a stylish and functional element of your home, reflecting your confident and knowledgeable approach to home improvement.
Frequently Asked Questions
What are some ways to improve the appearance of my laundry room sink?
There are several ways to enhance the look of your laundry room sink. Consider giving it a thorough cleaning using a strong, non-abrasive cleaner such as Bar Keepers Friend. Adding a decorative skirt or curtain can conceal the sink’s base and plumbing. Additionally, incorporating accent decor around the sink can improve its overall appearance. Ultimately, you can build a custom cabinet or stand to completely disguise the utility sink, creating a polished look.
How can I disguise my utility sink with a cabinet?
A faux cabinet can significantly improve the appearance of your utility sink by hiding the basin and plumbing. Measure the sides, front, and top of your sink to calculate the dimensions of the wood strips needed. Apply wood glue on the backs of these strips and attach them using a brad nailer, starting with the side pieces and then the top and bottom. This method will create a faux panel that appears like a standard cabinet front.
What are the best materials for customizing a utility sink?
When customizing a utility sink, opt for materials that are water-resistant and easy to clean, such as plastic laminates, plywood coated with a waterproof finish, and treated wood. For a more industrial look, you can use metal materials such as stainless steel or aluminum. Ensure that your chosen materials can withstand regular use and are compatible with the sink’s existing structure.
How do you create a DIY utility sink stand?
To create a DIY utility sink stand, start by taking accurate measurements of the sink and determining the ideal height for the stand. Design a frame using water-resistant materials, such as treated wood or metal pipes. Depending on the weight of the sink, ensure that the stand is sturdy and well-anchored to support the basin. You can also incorporate additional storage or decorative elements to the stand, enhancing both functionality and aesthetics.
What are some options for under-sink storage in a utility room?
Under-sink storage options can increase organization and improve the appearance of your utility room. Consider installing pull-out shelves, sliding baskets, or hooks for functional storage. Tension rods can also provide a convenient spot to hang spray bottles or cleaning supplies. For a more streamlined look, choose matching bins or baskets to keep the area tidy and visually appealing.
How can a skirt be used to decorate a utility sink?
A skirt can easily conceal your utility sink’s base and plumbing, providing a simple and cost-effective decorative solution. Choose fabric that complements your room’s color and style, and cut it to size according to your sink’s dimensions. Attach the skirt using adhesive Velcro strips, ensuring the fabric is securely fastened and can be easily removed for cleaning. This addition will instantly elevate your utility sink’s appearance, creating an attractive focal point in the laundry room.